In this article, we will discuss how to set up a dating bot. It works according to the following principle: when you ask for a photo, description, contact for communication and other interesting information about your interlocutor.

Development
For the implementation we will need:
A questionnaire that will request all the necessary data from the subscriber
A Google spreadsheet to which we will upload and download data.
A command to issue a random subscriber
Two variables - global {{number}} and personal {{random_number}}
Let's create a Google table with the fields we need.

In the example, we duplicate the value of {{first_name}} and {{last_name}}. In the first pair of values, this is text, our service information. In the second pair, we'll include clickable links that the bot will send to Random Coffee when requested.
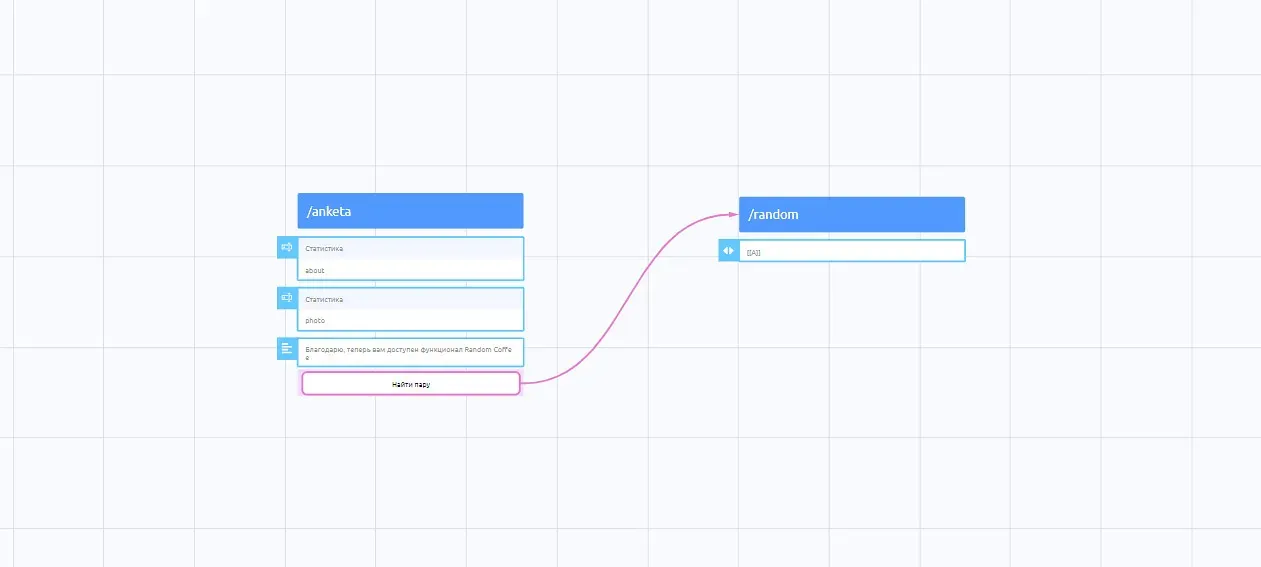
Let's enter the data into the /anketa command.

The data will be requested through the Input Form blocks.
Let's spell out the actions in our /anketa command.

Each time after someone fills in the form, the bot will increase our global variable by +1, and it will become a unique number for the new participant. Enter into the table the values you need according to the ToRs
Instantiate the issue command. In the actions through variable change, calculate a random number from the total value of the variable {{number}}. Be sure to select the sequence of actions BEFORE so that the number is calculated before the information is queried in the table.
It is important not to delete rows from the table with assigned numbers so as not to disrupt the order of issuance.
We display the information from the table via Google slider, searching through the coincidence of the number in the table column and the random number we generated.
![На скриншоте мы используем блок с изображением для выдачи информации. По умолчанию бот предлагает блог с текстом. Чтобы появился выбор, удалите блок с текстом. Обратите внимание, вместо ID изображения мы вписываем ссылку вида [[G]]](/blog/media/blog-e8319abe1d884f8a.webp)
In the screenshot, we are using an image block to give out information. By default, the bot offers a blog with text. To get a choice, remove the block with text. Note that instead of the image ID we enter a link of the form [[G]]
Verification
We've set up the random output. Now let's make sure in case the subscriber decides to write a big essay about himself.
By default, we can place no more than 1024 characters in the description of the image, and if the text exceeds this value, the bot will simply not output the info. There is an option to output 2 slider blocks - one contains the image and the other contains the text, then any description will fit into 4400 characters. But what if we want to limit the description to make it easy for other participants to read?
Then let's add a condition that will check the length of the text and enroll a new participant only if it is within the limit.

Let's also create 2 additional commands for 2 different variants - Limit exceeded and Limit not exceeded.
First, let's move all our actions (changing a variable and creating a row in the table) from the /anketa command to the Limit not exceeded command and add a transition to the Check length after filling out the questionnaire condition.
Inside the condition we will set up a check for the length of the message.
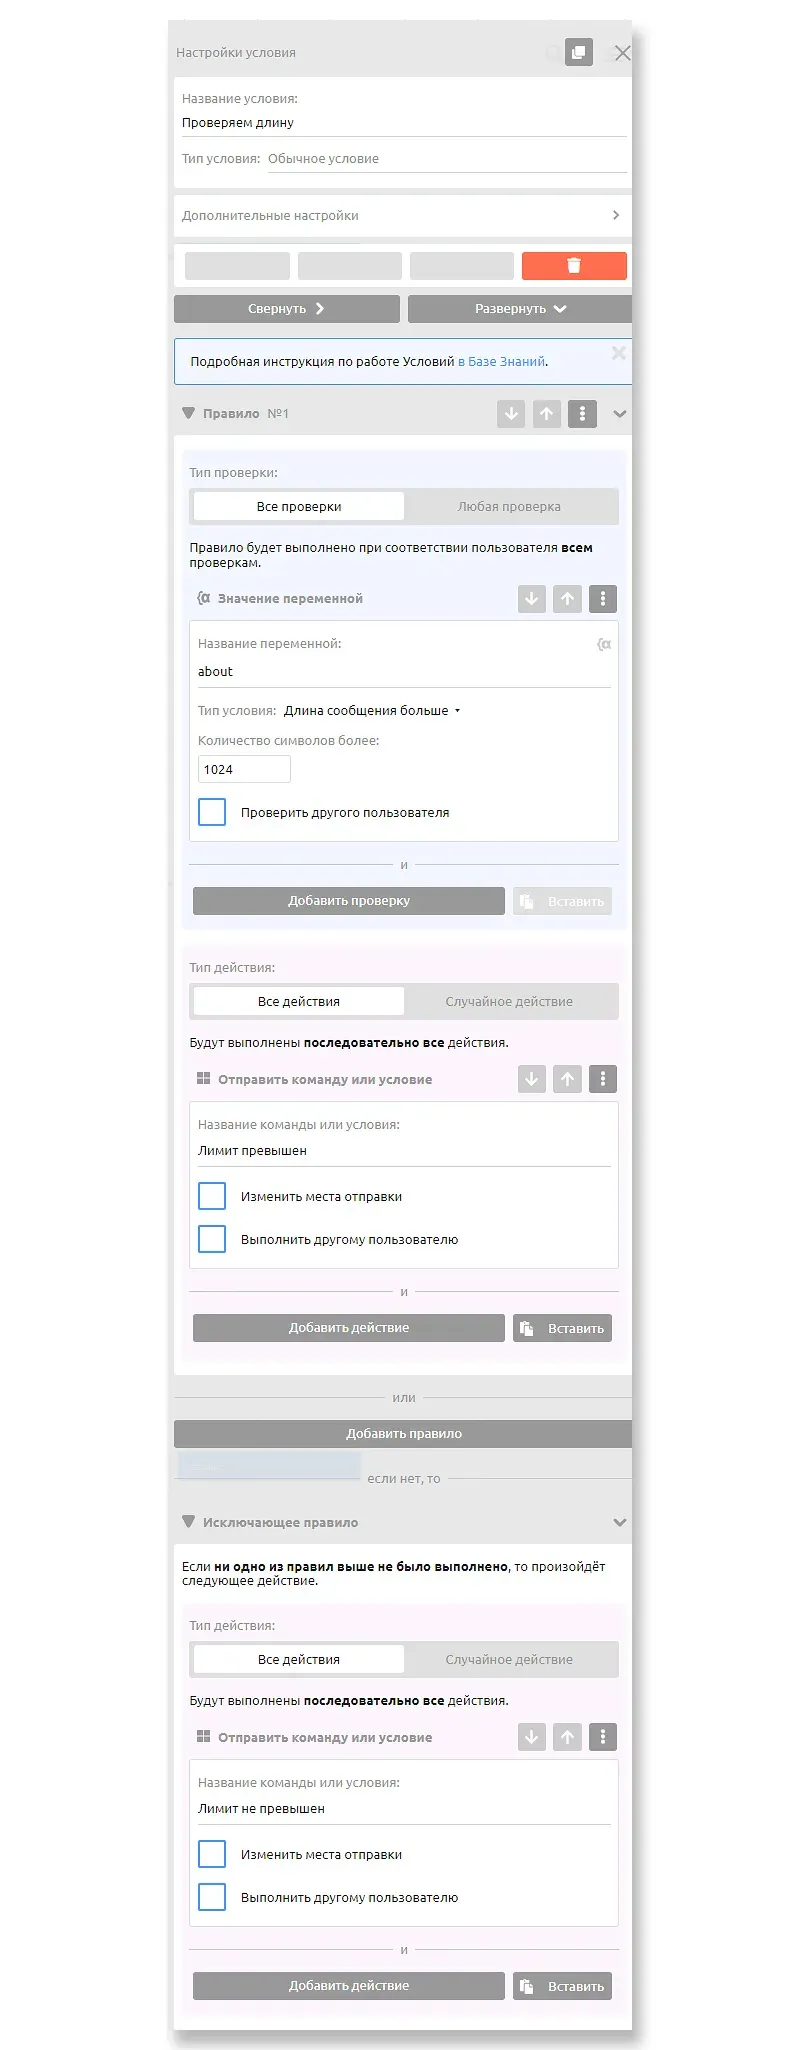
In the command Limit not exceeded already give access to the functionality.

In the bot itself, it is reasonable to give access to Randon Coffeе functionality only to those who have filled in their own information about themselves. Therefore, it would be logical to set up a condition button that will appear only for those who have a value in
{{photo}}and{{about}}variables.
Customize the command when the limit is exceeded, give the option to re-enter the text. In our example, we send the subscriber to the questionnaire again. You can customize it so that the bot requests only information on the description of yourself.

Addendum:
Create a personal account where you can change your photo and description if you wish
Add more items in the questionnaire, not just offer to describe information about yourself, but separately: work, how can I be useful, etc.
Offer an additional check when filling out the questionnaire - whether everything is filled out correctly. And only if you agree, send it for verification
Offer to enter first and last name - they are not always specified in the account.
You can also offer to use the ones you already have in your account or enter your own ones.
You can set up automatic sending of a random offer on scheduled days or hours and also offer to subscribe first to such an issue.
By setting up such a feature in your bot, you will increase community engagement. Put a counter on this command, add it to the daily report and you will be able to see how many people actually use the functionality.